
There’s much more to making backups than just copying files, as you probably know, you need a backup strategy. In this post, I’m not going to enter in detail on the strategic part. Anyway, I’m going to abide by the most basic and indispensable elements of a backup strategy, that is so, if you ever need your data, you have a certain guarantee that your data will remain available to you when most needed.
I’m going to start with a little bit of theory, I know it’s boring, but it will let you understand what you’re doing in the second part when we start using the console and giving instructions to the server.
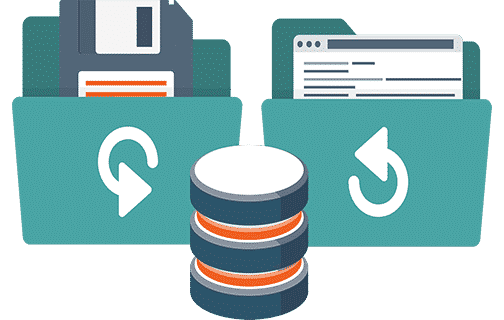
What do you need to back up?
From a backup perspective, your Mautic APP needs 3 things to be able to work again as if nothing ever happen:
– Your server setup: That would be your OS, your HTTP server (Apache, NginX) your Database (MySQL) and the config files for each of these.
– Database data: Your contacts, segments, campaigns, etc. as well as a great deal of your Mautic settings (but not all of them, some are stored in files)
– Mautic files. We can differentiate 2 types here: A: The Mautic code B: Mautic config files.
If your server dies for any reason, you’re gonna need the following to get your Mautic up and running again:
- Operating system (Ubuntu, Debian, CentOS, etc.)
- Server software (Apache2 or NginX with a PHP interpreter and the MySQL database engine)
- Server Config files (Your own settings for Apache, Mysql, PHP, etc.)
- The Mautic files (The zip file with the Mautic code)
- Your uploaded assets (Images, pdf files and any other attachments)
- Your Mautic Database (Not the engine, that’s included in Server software, but the data stored in your Mautic DB)
Each of these 4 types of data has different availability, because of that we will have to treat them differently in our backup strategy.
Snapshots:
A Snapshot is a “frozen in time image” of your entire server and includes the 4 elements you need all stored in one place, usually your VPS provider will be giving you this service as an option and it’s done in a few seconds with a few clicks on your VPS panel or even automatically if you set this up in advance.
Truth is, if your server dies, the simplest solution by far is to recover using a snapshot. If there’s an easy way to restore your Mautic server it’s having a full copy of the server and its contents, these full copies of your entire system are usually called “snapshots” and most cloud providers will offer to store a few of these full system copies, some providers offer some snapshots for free, others for a fee. Make sure you enable backups, preferably in an automatic fashion, at predefined times. If your VPS provider does not offer this possibility, run away as fast as you can.
These backups are very useful, but as you can imagine they are not cheap cause they take a full image of your entire system and take up a lot of “cloud space”. Another disadvantage is that “frozen in time” means that the data stored is only as fresh as the latest copy, so if you do a snapshot every week, you could lose up to 6 days of data easily. It also means that if your server died because of some problem that already existed when the snapshot was taken, it will be there still, waiting to happen again.
That’s why, despite the convenience of cloud snapshots, we want to have our data stored in some other format too.
Selective Backups:
There will be some situations where snapshots make little sense or no sense at all, for example, there’s little use of a snapshot when you are making a backup for migrating from one provider to another, as they usually cannot be downloaded to a different provider, and even if this option is available, chances are the snapshot will not be compatible with your new provider. (However using a 3rd party imaging tool might overcome this issue, but that’s beyond the scope of this post).
There are also many cases where you just need to backup some of the files, for example right before updating Mautic from one version to the next.
Using selective backups you can reduce the size and hence the cost of each copy you make, thus allowing you save space and money or to store many more copies of your data, for example doing a daily or even hourly backup.
With selective backups we don’t store again and again the parts of our system that don’t change and/or parts you are certain you can get elsewhere. So let’s examine the 5 components and decide which is the best way to store each one of these.
1. Operating system:
As stated before, the only fast way to recover from a system failure is a snapshot or other sort of image making software. If you don’t have that, here’s where using a cloud VPS comes in so handy, if your server dies, you can launch a new one with a few clicks and it includes your operating system of choice, already pre-installed.
After you launch your new server you just need to update your server to make sure it is up to date:
apt updateapt upgrade -y
After updating, you have your OS backup and good to go for the new step.
Because the OS does not change and is usually available in multiple places and formats, we would usually NOT INCLUDE this part in our regular backups. If for some extravagant reason you can’t have a cloud VPS, then you will have to keep a copy of your OS in a safe location, for example, you could store the links to where you can obtain the same version of your OS on the Internet. If you have a local server, you might want to have a copy of the right version of your OS stored in a drive. Finally, If you are on shared hosting, then the OS is none of your worries, just launch a new hosting account or delete everything in the current one and move on to the next step.
2. Server software:
This includes your HTTP server, usually Apache2 or NginX, loaded with the PHP interpreter of your choice and also the MySQL database engine; but it also includes many other smaller packages that are needed for Mautic to run properly. In other words, if your server died, you will also have to re-install all the server components. The same applies when you are migrating from one server to a new one.
Because the server software does not change and is usually available through simple commands, we would usually NOT INCLUDE this part in our regular backups.
3. Server config files:
However, each software has its own config files and those are usually catered to your own needs, so you might want to make copies of a few files that are not in your Mautic folder but scattered around your server directories. For Ubuntu 16.04 here are some files you might want to backup:
– Apache config: /etc/apache2/apache2.conf
– Apache Vhosts: Usually found on: /etc/apache2/sites-available (the particular files depend on your configuration, if you are not sure, copy all of them)- PHP.ini: Usually found on: /etc/php/7.0/cli/php.ini but depending on your setup, could also be found on /etc/php/7.0/fpm/php.ini
– MySQL config files: This one is tricky because your configuration can be in a number of files, from MariaDB manual:
The MariaDB/MySQL tools read configuration files in the following order:
- “/etc/mysql/mariadb.cnf” (this file) to set global defaults,
- “/etc/mysql/conf.d/*.cnf” to set global options.
- “/etc/mysql/mariadb.conf.d/*.cnf” to set MariaDB-only options.
- “~/.my.cnf” to set user-specific options.
Again, in case of doubt, save them all.
– Your Server certificates, If you are using any type of certificates on your server, you might want to store these in a secure location too, for most Mautic installations this will be Certbot’s created Open SSH certificates and they are usually stored at:
/etc/lets encrypt
You should store the right cert for your Mautic domain in your backup.
4. The Mautic files:
Unless you have edited the Mautic core files, in which case you probably don’t need this tutorial, no Mautic files will ever change except ONE:
– The Mautic local config file, found Here: /var/www/your_mautic_path/app/config/local.php
For example, if you are using Ubuntu that would probably look something like this: /var/www/mautic/html/app/config/local.php
Anyway, this file doesn’t change a lot, so as an alternative, you could just take note of the 5 lines in this file that really matter to your installation, these are located at the beginning of your local.php file
‘db_name’ => ‘your_DB_name’,
‘db_user’ => ‘your_DB_User’,
‘db_password’ => ‘yourdbpassword’,
The rest of the configuration parameters you can arrange afterward within the Mautic interface, but without setting those 3, Mautic will never start.
Because the Mautic files are found on the Internet, we would not include them in our backups unless we made modifications to the code. However, it can be smart to keep handy the URL for the download of the original mautic files of the same version you are running in your server, or even to keep at hand the zipped file somewhere in your server in case you have connectivity problems or to maybe shave some minutes off the recovery time.
5. Your uploaded assets
There are a few locations where Mautic stores files that you uploaded in some way, of course, if you decided to back up the entire Mautic directory and sub-directories you don’t really need to worry with this.
/path/to/mautic/media/images
Every time you add an image to an email or to a landing page it will be saved in this directory.
/path/to/mautic/media/files
Any attachments you have ever included in your emails, like a zip file or a PDF ebook, as well as any files that you added as downloads for campaigns are saved in this directory.
/path/to/mautic/themes
If you are building your own custom themes, editing the code of the provided themes or saving a theme for any reason, it will be stored in this folder.
/path/to/mautic/plugins
If you manually added any non-official plugin, via SSH, SFTP or FTP, you had to save them in this folder for them to work.
These are among the most common places where to find files unique to your installation even if you didn’t make any changes to the code.
6. Your Mautic Database:
At last we get to the core, Mautic stores most of its configuration in a MySQL Database, usually we will be using MariaDB, all your contacts, your campaigns, etc. also go to that MySQL database. This data is exclusive to your database and there is no other place where this data can be found other than your database, that’s why it is critical that you have as many copies of the data as reasonably possible. You also need these properly named and stored safely and in a way these are easy to recover in case you need them; as this can be tomorrow or one year down the road, it makes a lot of sense to keep a very clear and explicit directory scheme so you don’t have to rely on your memory to find out which one is the right backup you need to use.
Let’s get geeky!
Enough theory, let’s get our hands dirty… In order to save databases, copy files, move them around and send them to safe places we’re gonna need 3 tools:
– MySQL Client: This is the software used to interact with the database and you most probably had this already installed at the time you installed your MySQL server.
– Zip and Unzip: You can do all this without, but it’s quite helpful for grouping all sorts of different data in one file, and it does save some space in the process!
– Grive2: This is a Google Drive client that we can use to replicate our files to the cloud.
Installing the required tools:
It’s now time to log into your server using the SSH console. Before we start let’s make sure we are root so we can execute all these commands without trouble, you can type the following command on your SSH Console:
sudo su
We can now proceed and install all of the tools with a few commands:
add-apt-repository ppa:nilarimogard/webupd8
(press enter when requested)
apt updateapt upgradeapt install zip unzip grive mariadb-client
We now have all the needed tools installed and we are ready to start with the process of Backing up our Mautic server.
Creating a directory structure for your backups:
Let’s start by creating a “backups” directory within your user directory to store backups on your server, I suggest you also create more directories within this one to separate one backup (date or hour) from another.
mkdir ~/backups
What the “~” symbol is doing is signaling your own user directory, if you are using the default Ubuntu 16.04 settings this should be “ubuntu” so ~/backups is equivalent to /user/ubuntu, However if your user is “root” your folder will not be following this structure because the root user gets a special directory located in the root directory, so in that case it would be /root
If you can’t find your user directory there, you can use this command and it will tell you the path to your own user directory
echo $HOME
Now let’s go into your newly created backups directory:
cd ~/backups
Once here you can create any extra directories you need to keep things organized and easy to find afterward:
mkdir Back1 Back2 Back3
This command would create 3 new directories named Back1, 2 and 3 but of course, you should be using something like mkdir Jan Feb Mar Apr, etc… This example is a good choice if you are going to make backups on a weekly basis.
Or if you plan to make daily backups (very recommended), I find it useful to use one folder for each week, of course you can keep adding subfolders to your satisfaction.
For example, let’s create a folder for week 23 with sub-folders for every day
mkdir Week_1cd Week_1mkdir Mon Tue Wed Thu Fri Sat Sun
TIP: While in the console window, you can press the Up arrow key to show your last commands, makes it easy to do repetitive tasks.
Let’s say you want to create the same structure for week 2,3,4…54. The copy command is built like this
cp -r /path/to/existing/directory /path/to/new/location/newdirectoryname
So for creating the second folder, you would use:
cp -r ~/backups/Week_1 ~/backups/Week_2
In this way you don’t have to manually create so many folders, as the directories for the days of the week, would be created automatically.
After creating the folders you should make your way to the folder where you want to save today’s backup.
Backing up your Mautic MySQL Database
Now let’s make a copy of your Mautic database, the command we need to use is built like this:
mysqldump -p -u user_name current_database_name > database_backup.sql
Substitute “user_name” with your user name, “current_database_name” with your database’s name and you can use anything you want for “database_backup” but you want to keep the .sql termination. A good practice is to name your backups with the database name + date, for example: BAK-MauticDB-5-5-2018.sql I usually like to add “BAK” to signal this is a backup file, this is optional of course.
mysqldump -p -u root MauticDB > BAK-MauticDB.sql
This command will create a file in the directory where you are, the file will be named BAK-MauticDB.sql and it will contain all the data on your Mautic DB. You just made a Database backup and saved in its proper place, Yihaaaa! Wasn’t that hard after all…
Backing up your server config files
If you want to copy a file from any place in your server to your backup directory, you need to do it like this:
zip yournewzipfile.zip /path/to/the/file/filename.txt
For example, let’s say we want to copy the PHP configuration file named php.ini located at /etc/php/7.0/cli/php.ini, the command would look something like:
zip config_Files_backup.zip /etc/php/7.0/cli/php.ini
This will create a new file in the directory where you are, a file called config_Files_backup.zip and it will add the file php.ini inside it, already compressed.
You could call it BAK-php.ini, of course, but that would mean you would need to create one zip file for every file you want to backup, this is fine but we are going to store several files inside the same zip file, just for fun!
So, if you now want to add more files to the very same zip file you created before, for example one of the MySQL config files, you would use:
zip -rv config_Files_backup.zip /etc/mysql/mariadb.cnf
This will add mariadb.cnf to the packaged zip file as well as any others you added previously, this can be great for reducing clutter and keeping things tight.
In fact, the zip command is very powerful in Linux and can do many, many things, for example, you could store all those files encrypted by adding –encrypt
It can also add or modify files recursively, meaning only those files with changes will be modified, the list goes on forever, here’s the MAN page (full instructions for the command):
http://manpages.ubuntu.com/manpages/xenial/man1/zip.1.html#contenttoc4
One of the most useful features is to save the path where the file is located, so when you unzip the package, each file will go right to the directory it is supposed to automatically, but this is advanced and has its own dangers so if that’s something you want to do, you can learn all about ZIP using its MAN page.
Backing Up your entire Mautic directory:
Now let’s say you also want to copy all of the Mautic files, which you probably don’t need to do but you never know when it can come up handy…
Before we proceed, we are gonna empty the Mautic cache, after all, you don’t really need it’s contents and those directories are filled with lots of small files that slow down the processes and take space:
The command is built this way: PHP /path/to/mautic/app/console/ cache:clear
So If you are running Ubuntu using more or less, the default parameters, the command will look similar to this:
PHP /var/www/html/app/console/ cache:clear
Wait for the process to complete…
And now let’s zip the entire Mautic directory and save it all in one file, again, I am using the default path for Ubuntu 16.4, if you are using some other OS or even a different version of Ubuntu, your command may differ:
zip -r mautic_Files_backup.zip /var/www/html/
Store your backups in a secure location on the cloud:
We are now going to upload your backup files to your Google Drive account, how cool is that!
Before you start using Grive and execute the following command, make sure you are in your server’s Backups directory, that would be the root of the backups directory structure you just created:
cd ~/backups
We’re now gonna use grive to sync your backups folder AND any subfolder you have put in it
for that, first let’s configure Grive so it uses your own Google Drive By logging in to your Google Account:
Because the command is powerful and can result in syncing plenty of files, grive has a “test command” that will simulate the real command but will not send any files to Gdrive, I recommend you run it to make sure you are doing what you think you are doing:
grive –dry-run
If you are satisfied, we can now run the real command that will start syncing the data
ATTENTION: The following command will start syncing the folder where you are located to Google Drive
grive -a
From now on, you don’t need to repeat this process anymore, whenever you want your files synced to Gdrive you just need to go to the folder you want to sync, for example, today’s folder or maybe the backups folder if you want to sync the entire structure, when you are in the right directory, just type
grive sync
And the sync will take place. Simple and elegant isn’t it?
Now you have a copy of your data on your server, a copy on the cloud and you can easily move it to your PC or your phone with ease, good job!, Go get some sleep, you deserve it and tonight you will sleep better than ever before, knowing your data will be safe even if a meteor falls on the datacenter your VPS is on.
Stay tuned for the second part, restoring your Mautic Backups
and a third part: Automating your backups with Cron
If you liked this post please share it using the buttons below…
If you have a topic of interest that you would like me to write about, add a comment below or send me a DM to @_YC (Twitter)
All my tuts are based on Ubuntu, I use versions 16.04 LTS and 18.04 LTS, I recommend you to run it on your own virtual environment, preferably on a Cloud VPS.
My name is Yosu Cadilla, a Systems Analyst and Platform Engineer for mktg.dev
I discovered Mautic in 2017 and since have specialized in:
– Running Mautic for Marketing Agencies.
– Running large Mautic instances, sometimes with millions of contacts.
– Helping companies build and optimize their (usually Mautic) runtime infrastructure.
If you are planning on deploying Mautic for your Marketing Agency, or you have a large Mautic Instance…
Let’s have a chat! yosu.cadilla@gmail.com


